Hey ya’ll! I’ve been missing in action for a couple of weeks…had to take care of a couple of family things. I’ve missed interacting with by fellow DIYers and I’m so glad to be back!
I’m participating in some awesome link parties with several of my awesome blog sisters over the next few weeks! Be sure to check out the dates and blog info at the end of this post because you don’t want to miss any of these link parties!!
Things They are A-Changing
I can’t believe Halloween is just days away! We live in a neighborhood that goes all out for this day…there are cookouts in the driveways, houses are decorated from top to bottom and some people even turn their homes into haunted houses!! We usually walk the entire neighborhood along with neighbors and their children. We get to meet new neighbors, reconnect with old ones and basically just have a great time! Last year our ten-year-old son decided he didn’t want to go trick or treating anymore. I confess, this made me sad. I felt like he was growing up too fast and if Halloween was no longer something he wanted to do…what would be next??!!
Turns out, it wasn’t that he didn’t want to do Halloween anymore, he just wanted to do it differently. He now likes to actively help create and put the decorations on our home and has taken on the job of handing out the candy to trick or treaters. Sometimes when there’s a kid with a great costume, he takes a picture. He talks to the trick or treaters and gets really excited when it’s turns out to be one of his friends. So we still “do” Halloween, it has just evolved as our son is growing up. And I like it even more!
Easy Halloween Ghosts
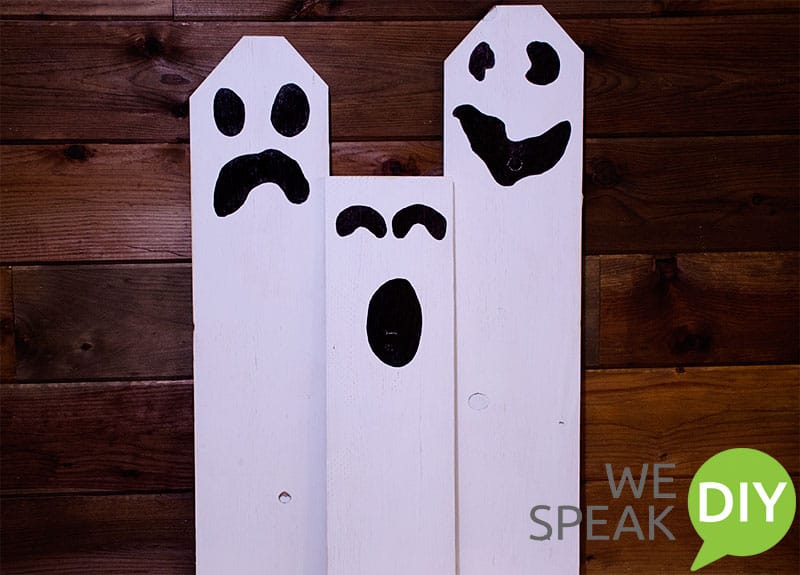
This year we’re adding a trio of three boo-tiful ghosts to our Halloween decorations and I’m showing you how you can make your own. It takes a little more than an hour to make three and anyone can do it. This is a great project to make with your kids…no matter how young!
Here’s What You Need for the Bodies
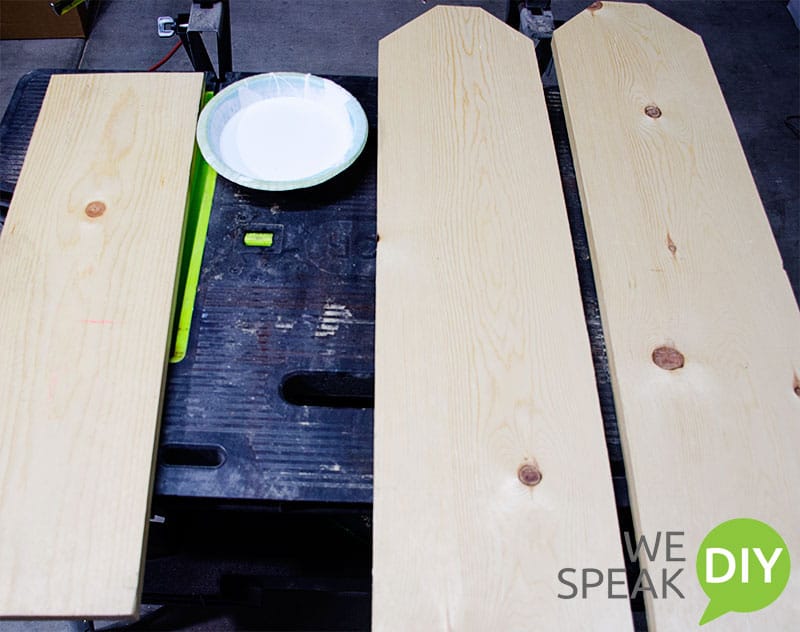
You need one board for each ghost. I used boards that are 7 ¾ wide…this gives you plenty of space to draw your ghost’s face. I cut the corners off two of my boards and left one square. You can use any shape you choose. If you like the look of the ghosts with the corners cut off, but don’t have access to a saw, buy fence boards! They come with the corners already trimmed off. Make them in any height you desire. Again, don’t have a saw? The store will cut the boards to your desired height. I made all three of mine different heights.
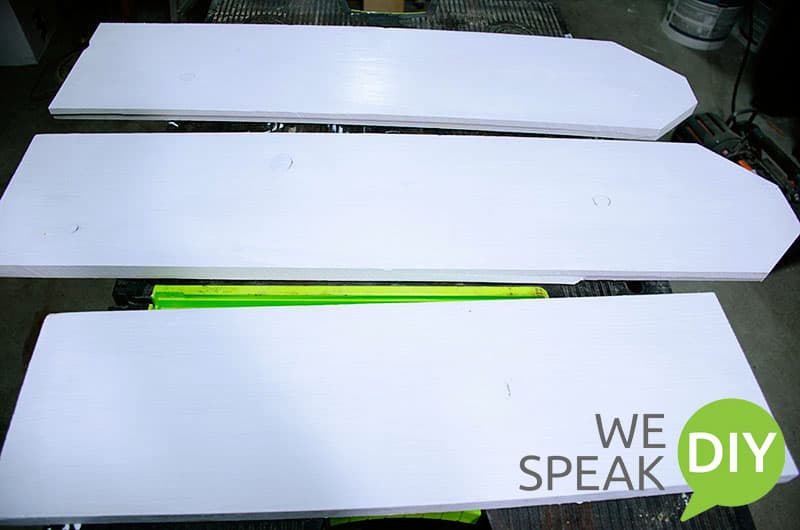
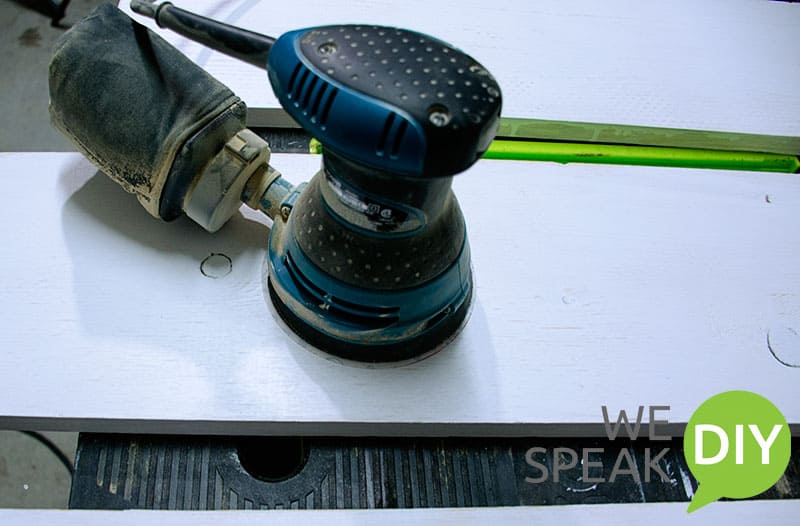
First paint the fronts and sides of your boards white. Let them dry for about an hour. Next lightly distress with 150 grit sandpaper. Wipe down with a damp cloth or tack cloth.
Draw the Faces
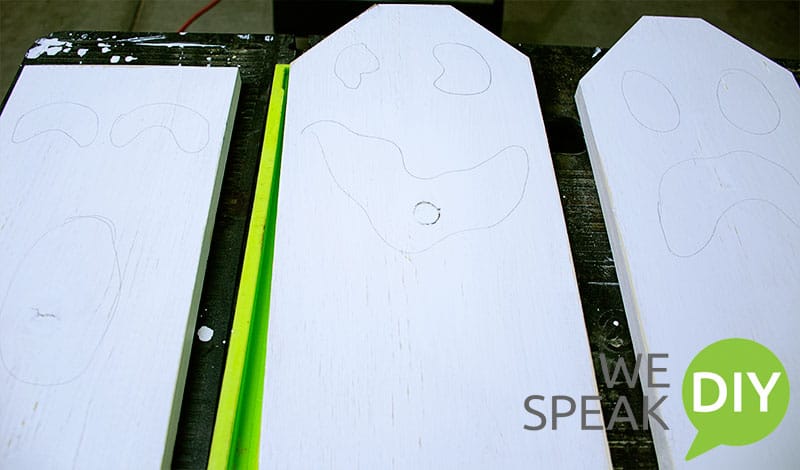
Using a pencil, lightly draw your ghost’s face. I had planned to paint my ghost’s faces with black paint. I didn’t realize until late the night I was making these that I had used the last of my black paint on another project. The last thing I wanted to do was get dressed, drive to the store and pick up paint! I needed a plan B. That turned out to be several black permanent markers. The markers actually worked better and were easier to maneuver than the paint brush when painting in the ghost’s face. Next time they’ll be plan A.
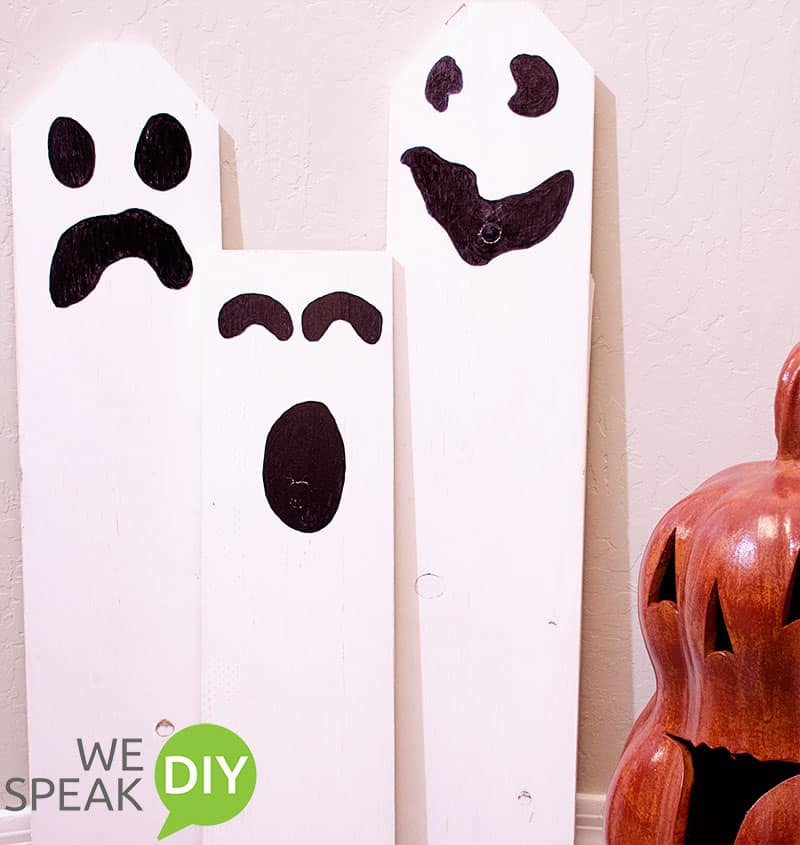
Display Your Halloween Ghosts
That’s it….your ghost is done! If you want to stick your ghost in the ground, you can add a stake by drilling a couple of holes in the bottom and inserting either a long wooden dowel or metal rod. If you do that, you can paint the back of the board white if it will be seen from the street. I’m just going to lean mine against the wall on our front porch and let them help our son greet the trick or treaters.
I’ve link this post to the Halloween Link Party at Adventure and Home! Be sure to hop on over and see all the great Halloween ideas for decorations and entertaining!


So clever! These are great! I love that your neighborhood takes Halloween so “seriously” :). For me, that was a huge benefit to moving to our current neighborhood: my kids join the horde and the streets are swamped with costumed kiddos!
Such an easy project! Thanks for sharing. Halloween sounds like it is so much fun in your part of the world!
I like the sound of how you do halloween! cookouts and crafts! These ghosts are darling! Love them! 🙂
Thanks Lacey! Halloween is big around here!
Thanks Lacey!
Laura’s right! This is SO CLEVER! It looks so easy and is a GREAT way to use up some scrap wood lying around. I think I would even go as far to make them double-sided with a ghost on one side and maybe a snow man on the other side? Then you can use it for the winter season too! Just a thought! Love how your ghosts came out though.
I certainly wish Halloween were more serious on our street. Of course, there’s only like 6 houses, so if 3 don’t participate that’s half the street… HAHA. So there’s that. Nice work! Also–Thanks for linking back to my link party! I’m so excited for all the inspiration!
Hey Megan! Thanks…it is soooo easy. And it is a great scrap wood project. I actually have the ghosts on both sides. When I use them in the yard and not placed against a wall, both sides show! Love the link party!!