One of the easiest and most dramatic DIY’s I’ve ever done is beef up our kitchen island!
Upgrades
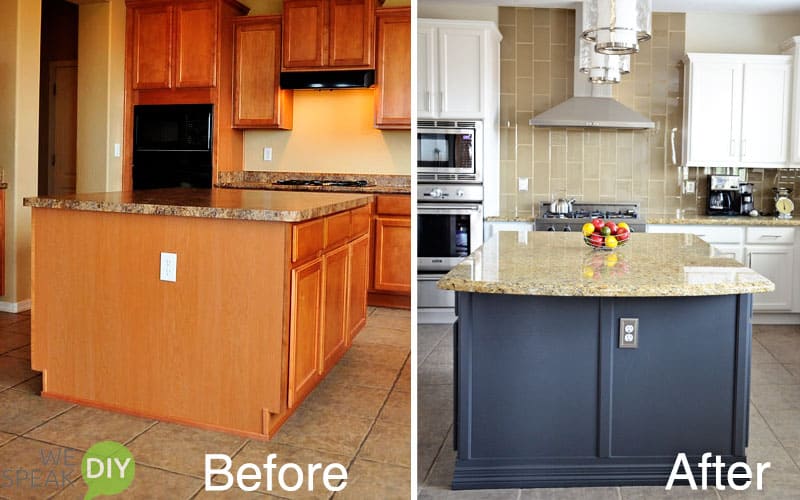
In 2011 when we moved in, we had a standard builder grade kitchen with the standard builder grade cabinets. The house was only 5 years old so they were in good shape. There was no reason to replace them and frankly, it wasn’t in our budget. However, we did make several improvements. We replaced the laminate with granite and added a backsplash – we actually did the backsplash TWICE – that story later! The appliances have all been upgraded and we added a new range hood.
Only Three Steps – But a Dramatic Change!
After we’d done those upgrades, the next step was to paint the cabinets. I’d been dreaming of white cabinets with a contrasting island and this was the most economical way to get what I wanted. Since we were painting the cabinets, it was also the perfect time to add upgrade the kitchen island.
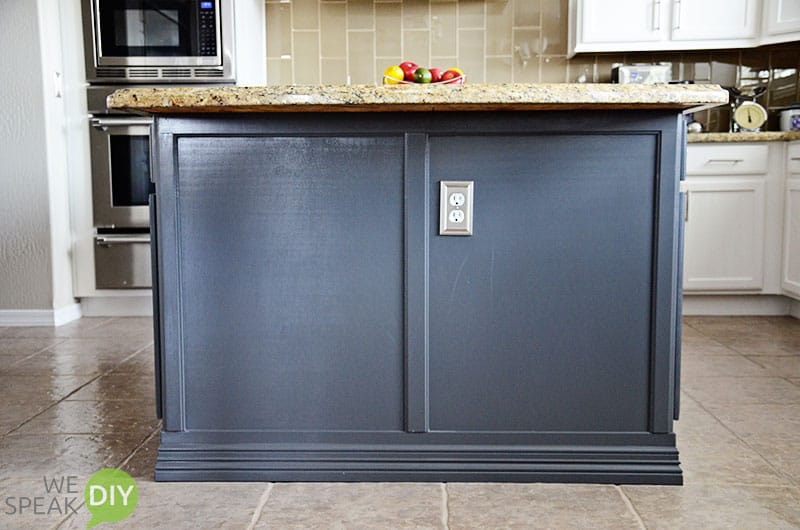
Because I was working with an existing island and countertop, I was limited in what I could do. I couldn’t add to the island because the counter would not cover it and the cabinets were too close to add any trim between the cabinet doors. So I only did three things, but those three things made a HUGE difference!
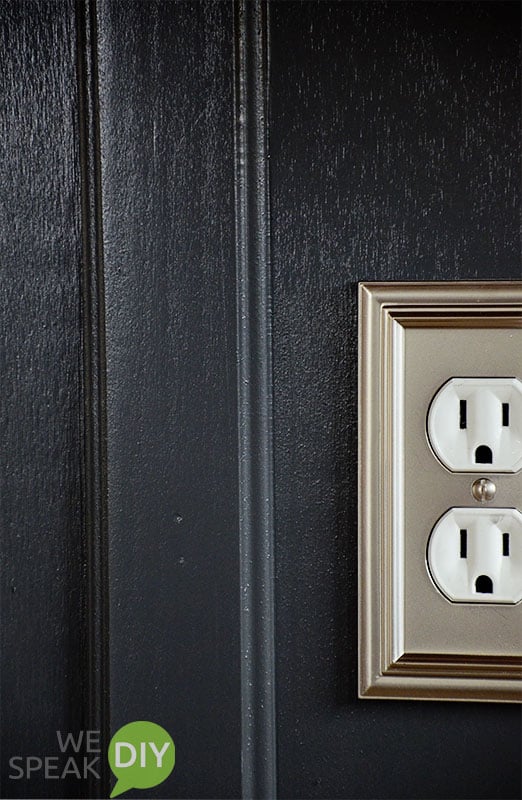
Trim added at each end of the island from molding I made with the router was really inexpensive – about $25!
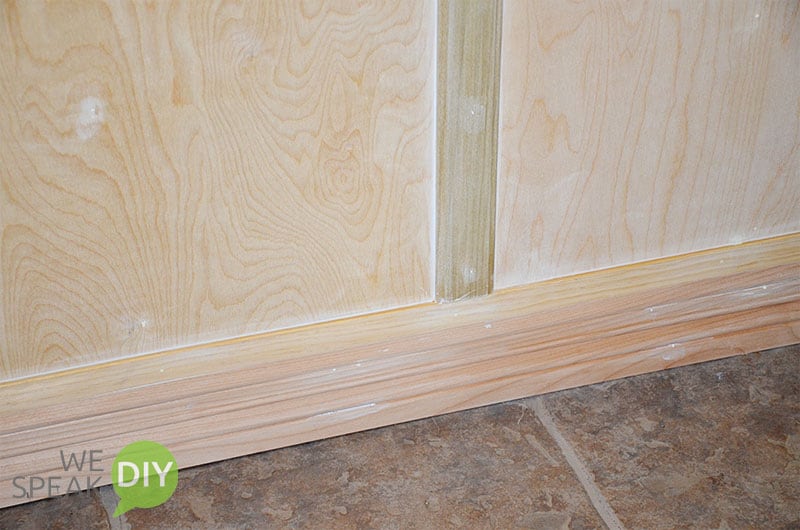
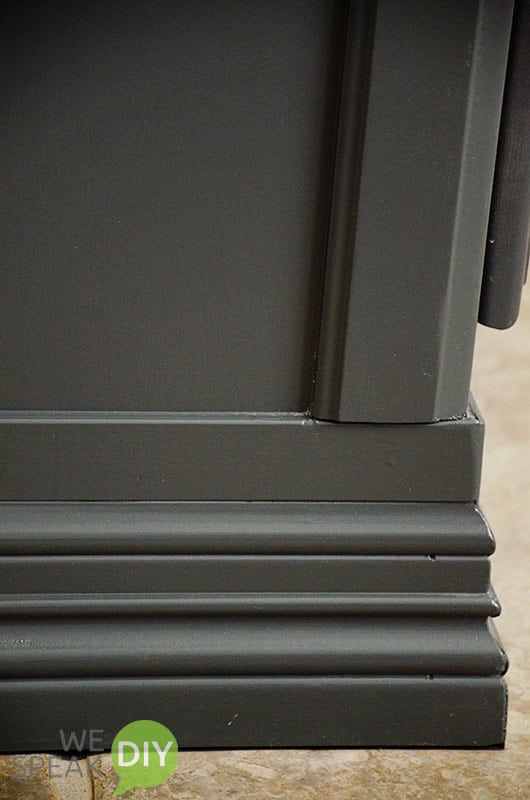
I also added molding around the bottom. The molding and trim store had the trim on clearance for $3.25 a feet and I used around 21 feet. I added a narrow trim to the top of that trim because I didn’t think it was substantial enough. That small trim only cost .75 a foot so the total cost for the bottom molding was $84.
After adding the trim, I filled in the nail holes and used caulking for any seams or gaps.
I used Benjamin Moore Iron Mountain paint color but had it matched in Behr for about $30.
That was all. Almost anyone could do this and it didn’t cost a lot of money – about $140 and our labor.
Budget Friendly Kitchen Island Upgrade
If you don’t do woodworking, contact your local woodworkers store like Rockler and Woodworkers Source. Get the contact information for a few of the local woodworkers. They can and most will create the moldings you want for your island but be sure to get a few quotes. I’ve done this in the past before I had all the tools and sometimes the differences in prices were really dramatic! Even after having a woodworker create your molding, this project shouldn’t be over $300. And that is definitely much less expensive than getting a new kitchen island!! And it made a HUGE difference!


You have always been a “Jack of All Trades”. But I see that you have become a Master as well. See you guys soon!!
I don’t know about Master…but I’ll definitely give it a try! Thanks.
Your kitchen after is just stunning. Would love to see more of it! Perhaps it is already in your blog…but I am new to it :). I am about to consider doing the same thing for a different reason. We had a Jenn-aire (have) cooktop which is larger than any on the market, sitting inside our granite in our island. Unfortunately it is broken, no parts available and no one makes them that large any longer not even jennaire. So we not only have to purchase a new cooktop but need to replace 10 year old granite. Since we won’t be able to match it, we are going to purchase contrasting granite and it will be light on our most recently painted bisque cabinets….I need contrast, so I too will be painting out that island. Thanks for the inspiration. May I ask why you chose Behr over Benjamin Moore?
Hi Debbie. Thank you so much. I think our kitchen will always be a work in progress. It seems that I always find a sale on Behr when I’m ready to paint. I’ve used a lot of Behr paint and it’s held up really well. But I’ve also used Benjamin Moore, Sherwin Williams etc. As long as it works well, I’ll use it! But I always look for a sale…I’m a bargain hunter. Several people have expressed an interest in seeing our kitchen update so I plan to do a kitchen tour by the end of this week! Btw…love your blog name!! I’ll visit.