If you’ve been following my other projects, you already know I hate to sand. Second to sanding is painting! So whenever there’s painting to be done, I call in my husband. He is the resident painter in our household and he’s really good at it. So when it was time to revamp the front porch, painting the chairs were high on his list!
I Love a Bargain
I bought two chairs at an online auction for $7 each about a year ago (I love a bargain)! The tag on the bottom of the chairs says they are from Pier One. That exact same chair is no longer online but the least expensive wicker chair they have is about $135! So I think I got a great deal!
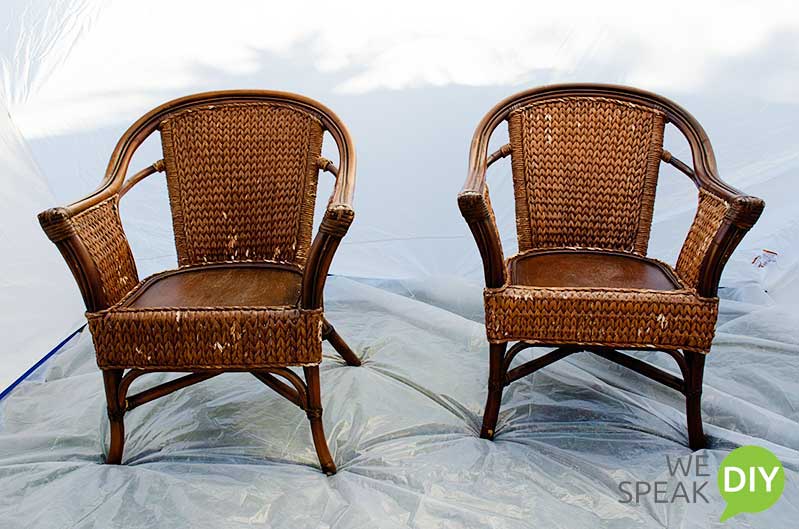
I could see they needed painting when I picked them up but they just weren’t a priority. So they sat on our front porch for about a year looking sad and rundown (sorry neighbors!). But now their time has come! Initially, Antoine planned to pick up a couple of cans of spray paint and use them to paint the chairs. But I knew this was the perfect time to break out the paint sprayer I’d purchased a few months ago. Antoine, on the other hand, wasn’t too sure about that.
Paint Sprayer – Best Thing Ever!
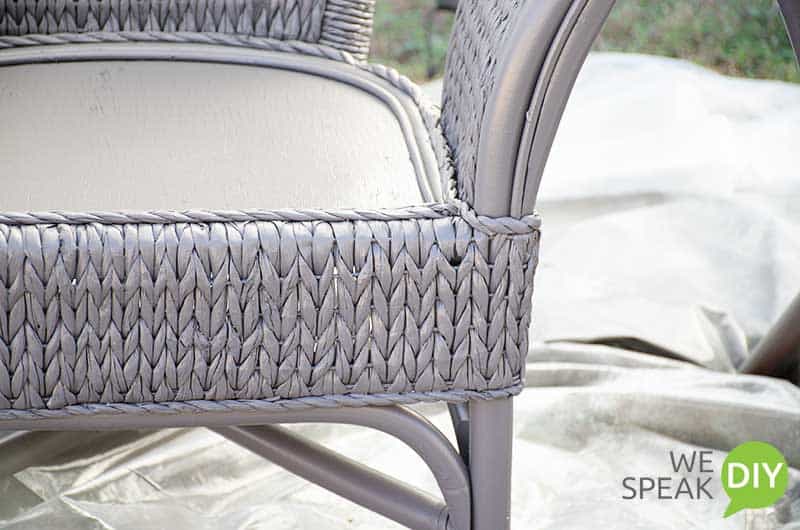
My husband was not feeling this “learn how to use a paint sprayer thing”. But he’s a great sport so he sat down with the instructions (yep, real men do read instructions) and the sprayer and the next thing I knew we were in business! We already had the paint I wanted to use – Sherwin Williams Iron Mountain paint matched in Behr. He had to thin the paint to work with the sprayer but that was easy. There’s a little cup included with a hole in the bottom. You dip it into the paint and time how long it takes the liquid to run out. If it takes longer than the time shown on the chart for that liquid, you need to thin it some more! Easy.
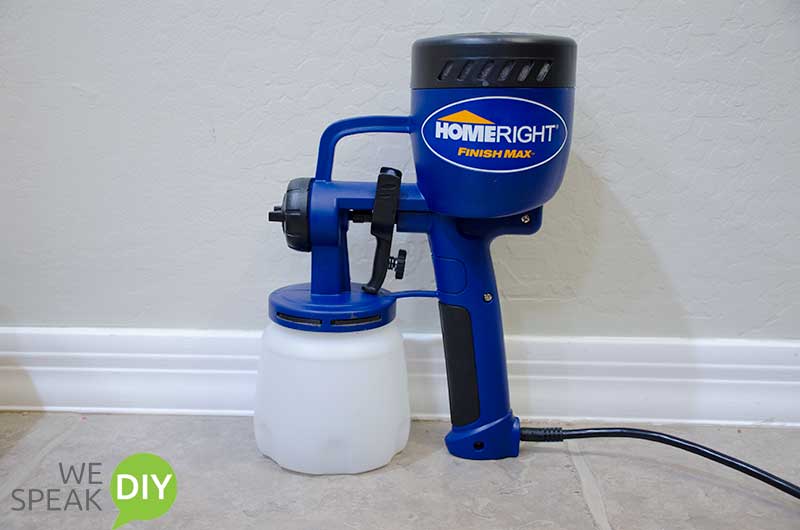
Once he got the thickness of the paint right, he cleaned the chairs with a dry brush. Then he started painting. His exact words were “I can’t believe I’ve waited this long to use a paint sprayer! This is great! Honey, you are a genius for buying this and convincing me to use it!” (Okay, he didn’t say the last sentence, but I know he was thinking it.)
Break out the Spray Tent
It was windy so we used the spray tent (everyone else calls it a spray shelter…looks like a tent to me!) I don’t use this enough to remember how to put it together, so every time I use it, I have to look at a video. Homeright has one but the video that is really easy for me to follow along is this video by Gail at My Repurposed Life. And every time I get it set up, I remember just how easy it is!

It took Antoine less than 10 minutes to paint each chair! I kid you not…less than 10 minutes! We let them dry overnight and now I’m making new chair cushions for them. I’ll show you that next week and give you instructions for making your own!

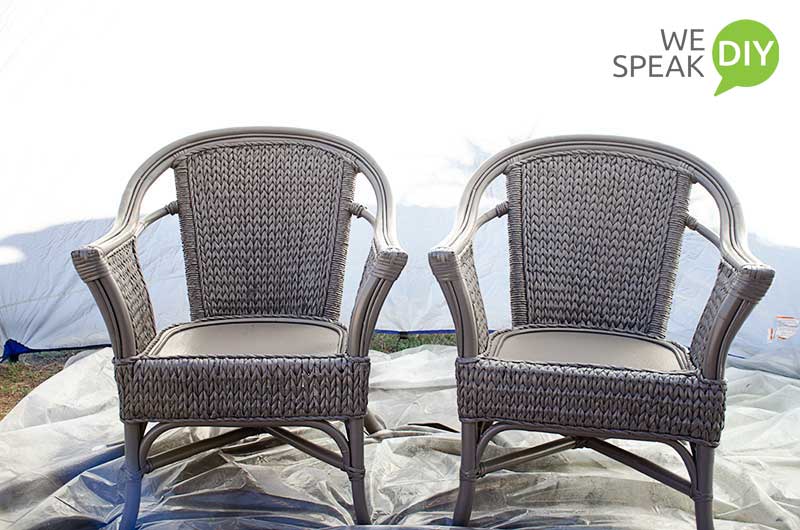
Here’s the before and after…remarkable!

Tools We Used to Do this Project
(This post contains affiliate links. For more information, read my disclosure page.)


Leave a Reply