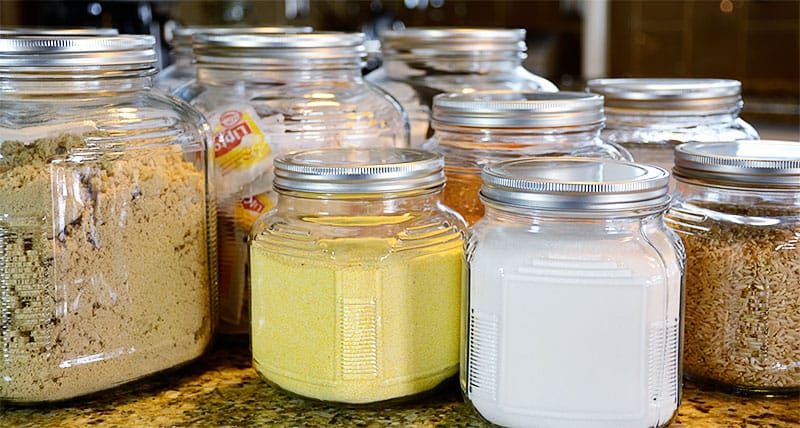
 Before we began working on the pantry, a hodgepodge of containers purchased over the years held all our staples. Some of them still functioned well, others…not so well! One of my pantry goals was finding pretty, airtight containers to hold all the dry goods. My requirements were simple – airtight glass containers that matched with screw on lids, available in a variety of sizes at a reasonable price. Was I surprised to find out how expensive and impossible it was to find exactly what I wanted! Because I needed a LOT of containers, over $10 each was not an option!
The closest thing I found was the Anchor Hocking Cracker Jars. While I loved the look, the size, the price, and the screw on lids, only one thing was missing…they aren’t airtight.
Sugru to the Rescue!
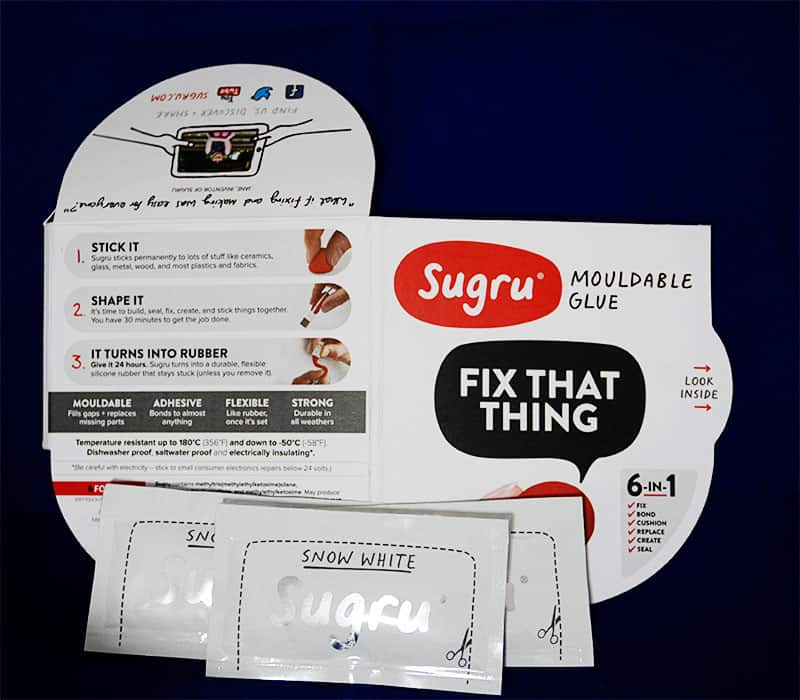
Enter Sugru! I had never heard of this product before, but I found it online while searching for a way to make things airtight. A quick google found that Sugru is a moldable glue (think playdough) developed in London. The best thing about this nifty little product is that that in 24 hours it dries into rubber! I didn’t even know that was possible! Because it comes in small packets which were a little pricey, using Surgru added about $2.00 to each of my canisters. But since the cost of the largest size jar (big enough to hold 1 ½ 4-pound bags of sugar) was only $5.79, I was okay with that! So my final cost would be $5.79 for the smallest jars and $7.79 for the largest jars…not bad!
How to Use Sugru – So Simple a Kid Could Do It!
This is one of the simplest projects I’ve ever done and you’ll be amazed at how easy it is!
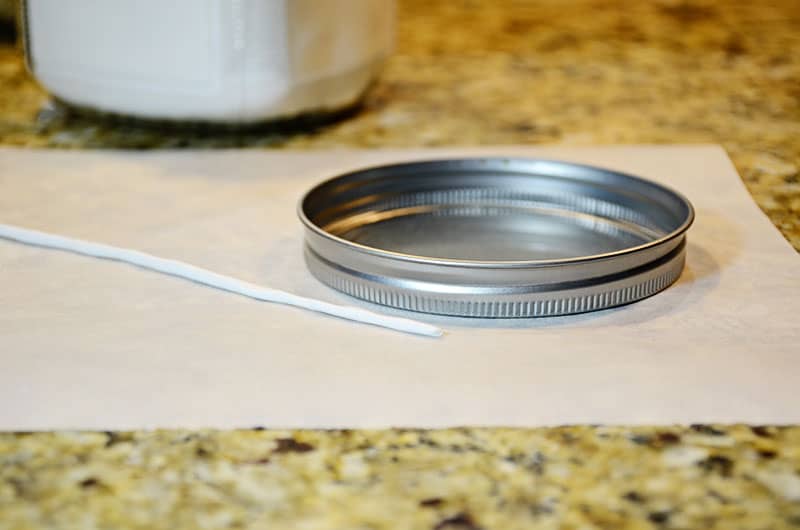
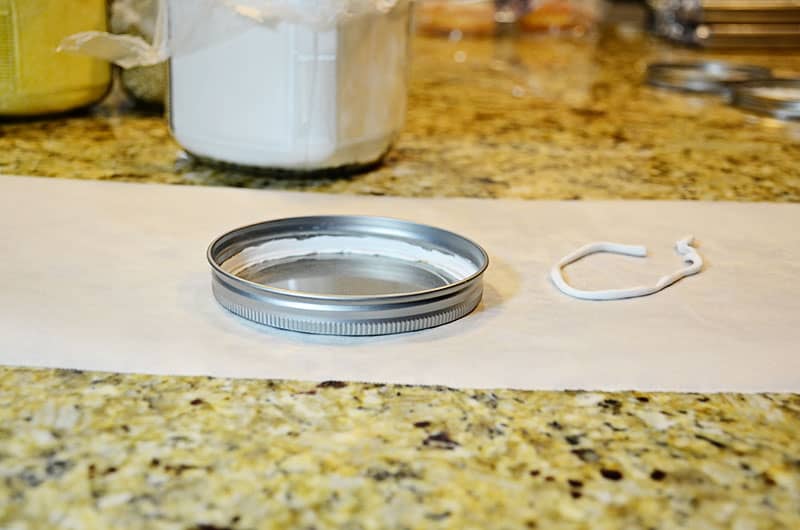
Simply take the Sugru and roll it into a string.
Press the Surgu string into the lid where the top meets the side.
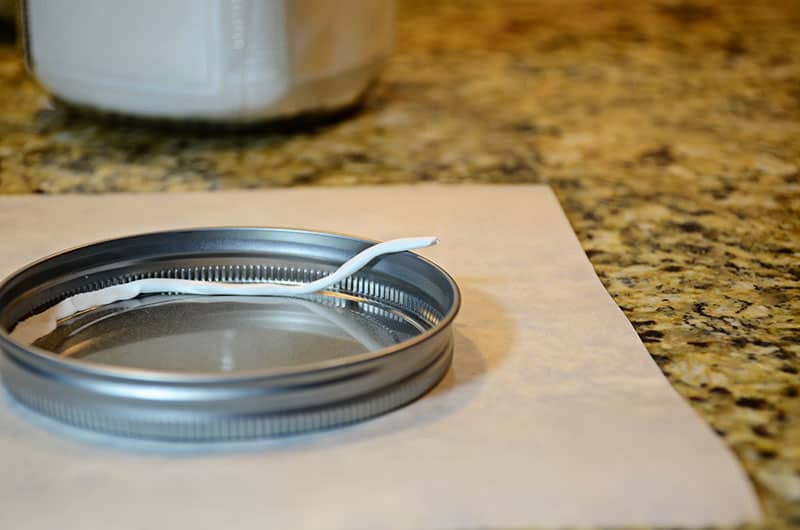
Play with it until you get the shape you want, and then set it aside for about 30 minutes.
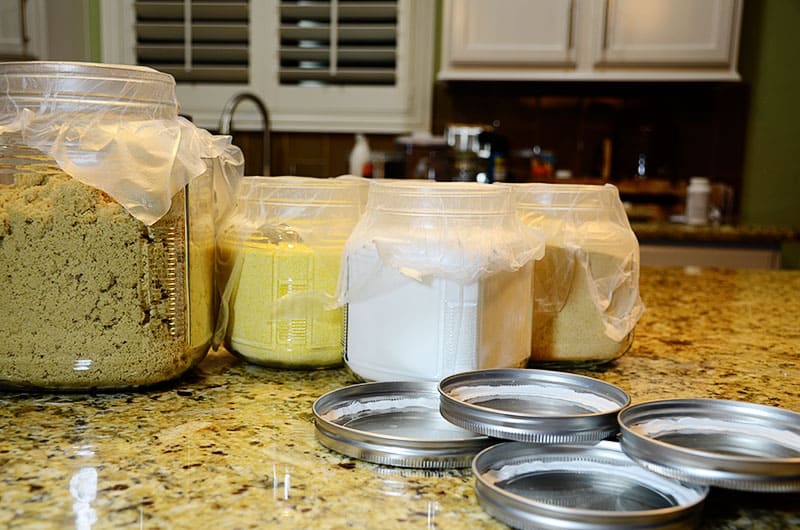
After 30 minutes, lightly screw the lid onto the jar before it becomes too hard, so you can make sure it fits. This will also make a sort of imprint – like a track the grooves of the jar fit into.
Take the lid off, set it aside for 24 hours and you’re done!
So simple! And I love these airtight glass containers. Word of caution – when these are full, (depending on what you fill them with), they can be pretty heavy. I know a lot of people use the plastic jars from the .99 store or Walmart; this will work for them too!
If I use Anchor Hocking jars, I usually paint my lids or use a clear sealer. They will rust after repeated washing!
How I Use My Airtight Glass Containers
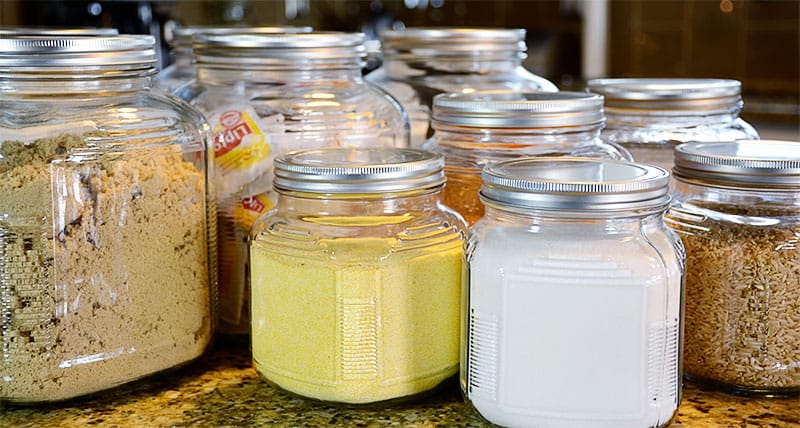
You can use your jars for anything, but here’s what I keep in my airtight glass containers:
- White Flour (including Bisquick!) – While white flour really doesn’t need an airtight container, I keep it under an airtight seal in order to keep bugs and odors out. And it’s so much more attractive than the bag it came in!
- Sugars – Sugar (brown, confectioners and white) attracts moisture, so keeping it in airtight containers prevents clumping. It also keeps the ants out!
- Rice, Beans, and Whole Grains – Airtight containers keep moisture and outside flavors and odors out.
- Spices – Keeping spices in airtight containers lengthens their shelf life. It also prevents spices from picking up the scents of neighboring spices.
- Dried Fruits – Airtight containers will keep dried fruits from hardening.
- Baking soda and baking powder – I don’t think it’s really necessary to keep baking soda and baking powder in airtight containers, but the baking soda box always seems really flimsy to me. It never closes properly once you open it, and I’m not a fan of open cooking items, especially not in the summer with bugs, ants, and gnats hanging out. So I opt to keep them both in jars!! HINT: To test if your baking soda is still active take ½ teaspoon of baking soda and add a few drops of vinegar. It will fizz vigorously if it’s still fresh. To test baking powder, mix 1/2 teaspoon baking powder with 1/4 cup water. If it’s still fresh, it will bubble.
Whelp folks, there you have it. The easiest way I have found to make airtight glass containers. I hope this little tip serves you all well. Be sure to come back and see how I took these jars up a notch by adding a couple of special touches!


What a great idea! Definitely will keep this blog in my mind in the future. Thank you for sharing!
Thanks Christina! Let me know if you give it a try!
I plan to use those hard in my new kitchen; thanks for the tip!
Lynne, Thanks. A new kitchen…that’s exciting! I’ll be posting another article that will share how to take the jars up another notch!
Meant to say jars; oops!
Teresa, great idea! Thank you for sharing this tip. I can’t wait to start gathering the jars!
I know Christine! I was so excited to discover this product. I did find that if you use the Anchor Hocking jars, you should polyurethane your lids or they will rust! Let me know how your jars turn out! Thanks.
Wow, girl!!! I’m blown away! So much awesome content in only 5 weeks time. Amazing! 🙂 Thank you so much for dropping by my facebook business page. Otherwise, I might never have found your beautiful blog. Also, thank you for especially this amazing blog post. Never thought this was an option. I really need to get this myself.
I wish you a most successful 2016 and I hope your blog will keep growing at this rate! If you would love to talk blogging, feel free to contact me per email. You have it as soon as I hit reply on this comment! <3
All the best and have a most wonderful week!
Sandra
Thanks Sandra! I wish you a great year too – we’ll keep in touch!
I love this! I always pass on cute containers because they aren’t airtight. Now, I don’t have to!
I find so many uses for this product…I love it.
I know I’m a little late to this party (more than a year past after the last comment), but I have three important (and long) points to make regarding this post:
1. (At least in regards to Anchor Hocking’s beautiful cracker jars)….Don’t waste your time researching alternative methods to creating an airtight seal with these lids. TERESA HAS DISCOVERED THE PANACEA FOR AIR LEAKING LIDS. I’ve researched this topic TO DEATH, starting with the discovery there are no 120-400 (lid size for the gallon jars) metal plastisol lids unless you are willing to buy a minimum quantity of 500. I tried glueing round cutout liners I made from a silicon baking mat to the lids…ugh, no…adhesive isn’t working, either because of the rubber or the metal, or maybe both…who knows? I looked into buying O-rings to shove in the lids but what kind of O-ring? Food safe, at least for the occasional food contact? And will they even stay in place? I came to the conclusion until Anchor Hocking/Oneida decides to sell lid replacements with plastisol in them (hint, hint to you, Mr. Hocking), this is the PERFECT solution.
2. These cracker jars are indeed beautiful, and inexpensive. At this point, we are almost a 100% glass storage household (funny how things circle around….when I was a kid, no mother would be caught dead with a glass storage container….orange or green Tupperware was were it was at!). I prefer glass because there is no residual smell, and it is see-through, so I don’t loose track of how much product remains in the container. And I prefer AH’s cracker jars because they have a vintage look, and go nicely with my vintage mason jars (for the record, first, I’ve always loved mason jars…even before the mason jar craze, and second, all our mason jars are utilitarian…that is, regardless of age, they are all used in some function, not decoration..because after all, they are jars!)
3. Teresa is NOT joking when she warns to be careful with your heavier jars! You guys should have seen my three little toes after my full flour gallon sized jar that fell on them. Luckily neither bones nor jar broke, but boy, they were badly bruised!
At any rate, thanks so much, Teresa, for this awesome solution!
Wow Jeanette! You really do understand my pain. I did the same thing – researched, researched, researched. This was not only the best but really the only solution I could find. And I am so sorry about your toes – these jars are great but heavy when filled.
Hi just came across this today, love this idea so went to amazon , some comments say this stuff dries out and cracks. wondering if you have had any problems with it cracking and or coming off.
Thanks,
Marge
Hi Marge. It’s been a couple of years now and I haven’t had any problem with it drying or cracking. And we live in Arizona where it’s pretty dry.
I am thinking of doing this, but I am lazy and trying to find other lids first. Did you try looking for mason jar-like lids? Something you could buy silicone sealing rings with and screw on? I love these jars, but wish they were air tight 🙂
Hi Tori…I am lazy too! I tried EVERYTHING before I went this route. I wanted something glass with airtight screw on lids. And I wanted it to be pretty. This was the best solution for me.
You mention that you paint the lids to avoid rust, is there anything special you use to do this?
Hi Cassie. I use acrylic paint but then I seal it with a food grade shellac. That way I know the paint won’t come in contact with the jar contents. And while I seal the entire lid, I only paint the outside of the lid.
Would this work with a glass lid? I’d like to purchase the Anchor Hocking Heritage Hill glass jars for my coffee bar but they’re not airtight 😩
Christine – I know I’m really late responding but I don’t see a reason this wouldn’t work. I think you’re biggest challenge will be making the Sugra look neat so the lids don’t look messy. That’s if you can see it through the glass. Good luck! Let me know how they turn out.
Mari – I’ll have to try making Oogoo! Thanks.
Hi Teresa
So glad I found your blog. Do you out the lids in the dishwasher. Does the paint and shellac stay on if you do? Can you recommend a food cage active paint and shellac. I am signing up , you are a treasure trove.
Hi Theresa! (Love your name, by the way!). I don’t put my lids in the dishwasher so I can’t tell you if the dishwasher would affect the finish. I use acrylic paint and then seal with a food safe epoxy. I use my jars for dry foods and the lid really never comes in contact with the outside of the lids.
Thank you so much for this great idea! I want to use your idea to turn some ikea glass jars into air tight containers for my pantry. My question is, do the sugru lids become damaged or unusable after a while with always re-opening and re-closing the jars? Thank you again.
Hi. Because our sugar, flour, tea bags etc are in the jars, we close and open them all the time. It’s going on over 2 years and I’ve not had any problems.
This is so great, I followed exactly the same situation as you and a commenter!! After SO much research, I only like anchor Hocking cracker jars for reorganizing my pantry and the lids are the only (major) downside! I took your advice and bought sugru and made the seals tonight and am SO grateful for the tips! It really was so easy like you said. Thank you!!!
Does this process work on ceramic kitchen canisters?
Rhonda – I don’t see why it would not!