Anyone who works with wood on a regular basis (and is a little bit of a hoarder!) knows about scrap wood. It grows, it multiplies, it takes over spaces and it is really hard to throw away however, it just feels wrong to get rid of something that could be made beautiful! But, I’ve either got to get rid of it or make it work for me. This chalkboard is the first scrap wood project in my efforts to reclaim space in my work area. Wish me luck!

Scrap Wood for Chalkboard Bulletin Board
Scrap Wood Project Goals
My goal is to do one scrap wood project each week until my sizable scrap wood hoard is significantly reduced! There are just three rules for these projects…they have to be useful, they have to use only the lumber left over from other projects and they can’t take an astronomical amount of time. My first scrap wood wonder project (yep, that’s what I’m calling this) followed all the rules! I always planned to build a chalkboard for the pantry but knew I didn’t want just a chalkboard with a frame around it.
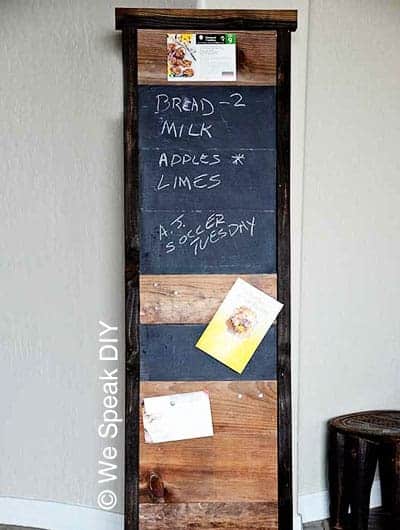
Realistically, I don’t need a lot of chalkboard space. I’ll jot a few notes on it every now and then when I need a reminder but my 10-year-old will probably write on it more for fun. I’m more apt to stick a note, a bill or a schedule on the board with a tack than to write something with chalk but I do like having that option. So I decided to incorporate both – the chalkboard and a sort of bulletin board! I wasn’t sure how it would turn out (what’s in my head doesn’t always translate well to the wood!) but we all really love it. And it only took a couple of hours to complete minus paint drying time.
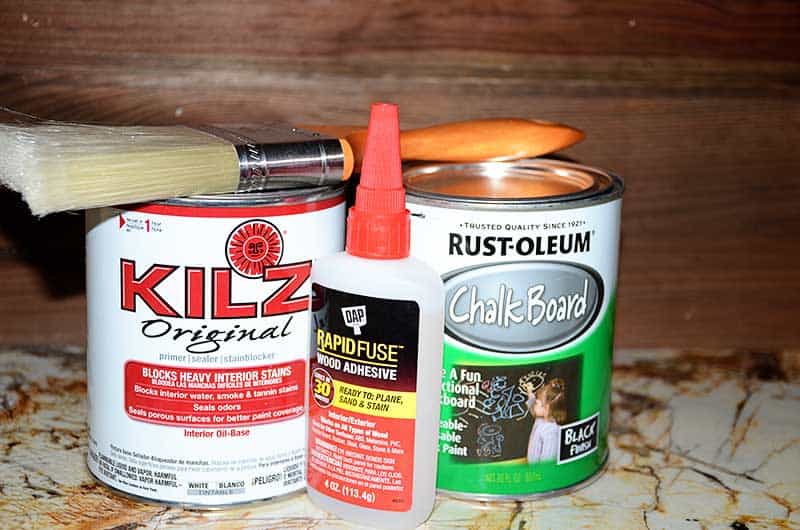
All I used to complete this project was:
- Kilz primer (left over from another project)
- Rust-oleum Chalkboard Paint (purchased for a project that never happened…sure that’s never happened to you!)
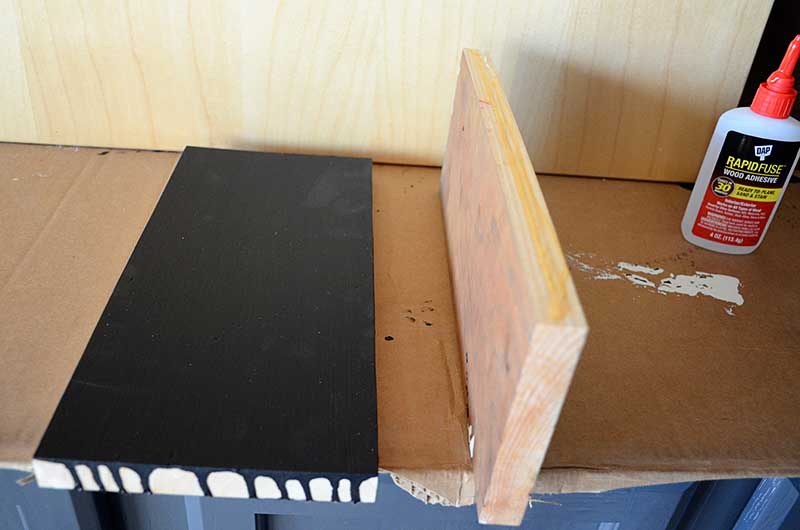
- RapidFuse Wood Adhesive Glue (free sample at a conference!)
- Paint brush
Preparing the Wood
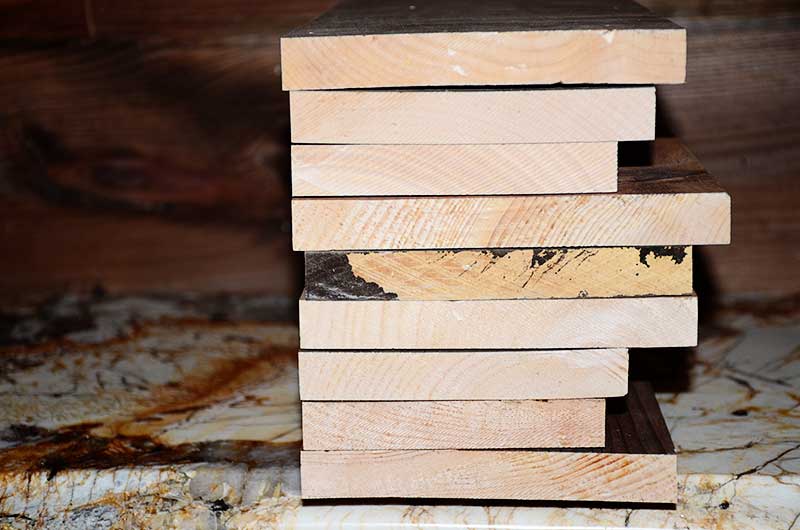
First I measured the wall where the chalkboard would hang. Allowing enough room for the frame, my planks needed to be 12 inches wide. So I gathered lumber pieces that were at least that width then cut all the bigger plank pieces down to 12 inches wide. Some of the pieces had notches and splits, so I trimmed away all the “bad spots”. Since I really did not have a definite height for the piece, the planks could be any height. If I wanted it taller after trimming, I could just add additional board(s). After trimming the boards, the total height of the planks was 47 inches. Since these were left over from our wood plank wall, they were already stained. If you don’t have pieces already stained, you should stain or paint them before you put the pieces together.
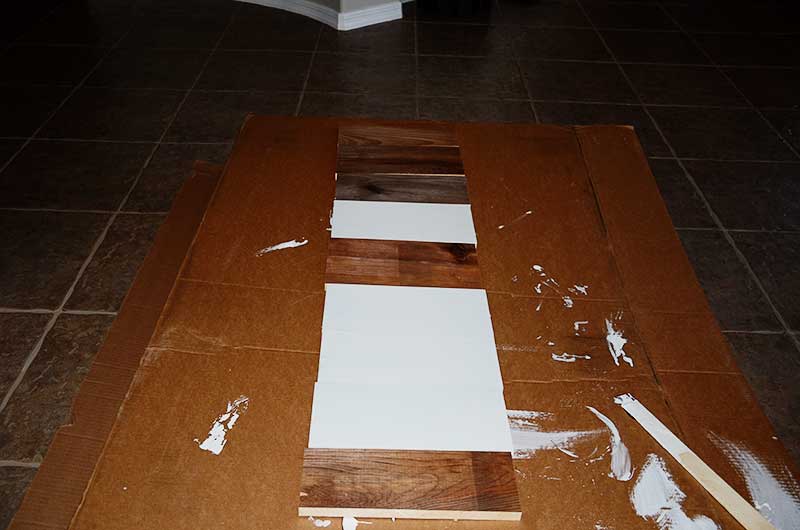
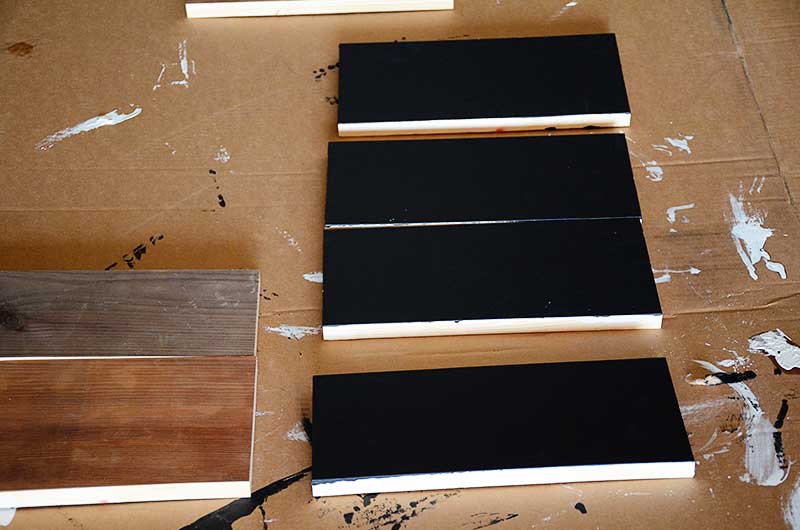
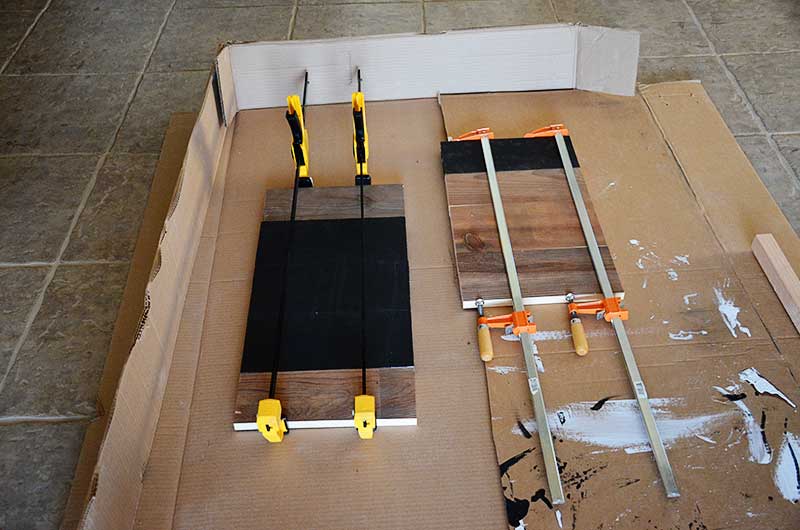
Next I placed the planks together and picked the pieces I wanted to use as the chalkboard. To make the chalkboard area large enough and actually usable, I put together several planks. I then painted the chalkboard pieces with primer and let them dry. After they were dry, I painted them with two coats of chalkboard paint. Putting the planks together was simple. I just used Dap Rapidfuse wood adhesive glue – no nails, no screws…just this glue!
I didn’t have a clamp long enough for all the planks so I separated them into two groups.
Time for the Frame
While I was waiting for the glue to set (about 30 minutes!), I cut the 2 X 2’s I used to frame the planks. The 2 X 2’s for the frames were cut the same length as the combined height of the planks, 47 inches. I cut the top of the frame 16 inches and the bottom 15 inches because I thought it would look better AND be a lot easier than trying to get it to fit perfectly flush. After cutting the pieces to length, I stained all the frame pieces using the tea and vinegar method. After putting on the tea, I waited 15 minutes to apply the vinegar (I already had the vinegar and steel wool in a jar).
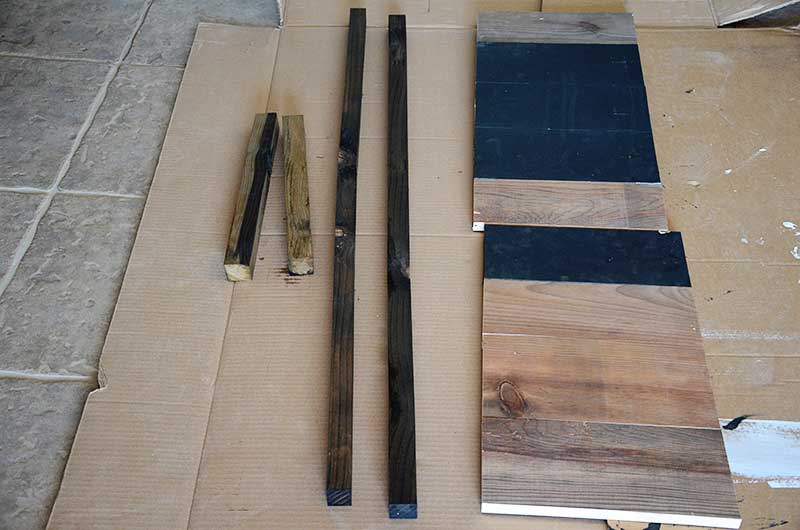
I lined the 2 X 2’s up with the back of the first set of planks and nailed each side together with brads and my nail gun. This created an inset look that I really liked. Then I aligned the second set of planks with the first and nailed it on each side. I centered the top and the bottom frame pieces and attached them. Finally, I seasoned the chalkboard by rubbing it with a piece of chalk and wiping the excess off with a paper towel…and that was it! Done!
Scrap Wood Project
First Scrap Wood Project Done – it’s a Wrap!
This was a fun scrap wood project. I didn’t really worry that much about making it “perfect”. The imperfections add to the project. I did not sand ANYTHING! The lumber is rough and it looks great! You can make this as tall or as short as you want. It can hang horizontally or vertically or you can stand it against a wall. You can paint or stain the planks. Since the pine wood planks are soft, the thumbtacks go in pretty easily. Can’t wait to show you a picture of it in our pantry…that’s coming soon!


This is amazing… Simply amazing. I’m thinking about making this. It would be such a great addition to our classroom!
Thanks Shamia…let me know how it turns out!
Love this! I know what I’m doing with me scrap wood now!
Danielle – Let me know how they turn out!!